Putting Everything Together
Designing and Fabricating the Housing
There is no single, correct way to actually position all of the sensors, and create the housing; instead, there are several key parameters that the housing should satisfy:
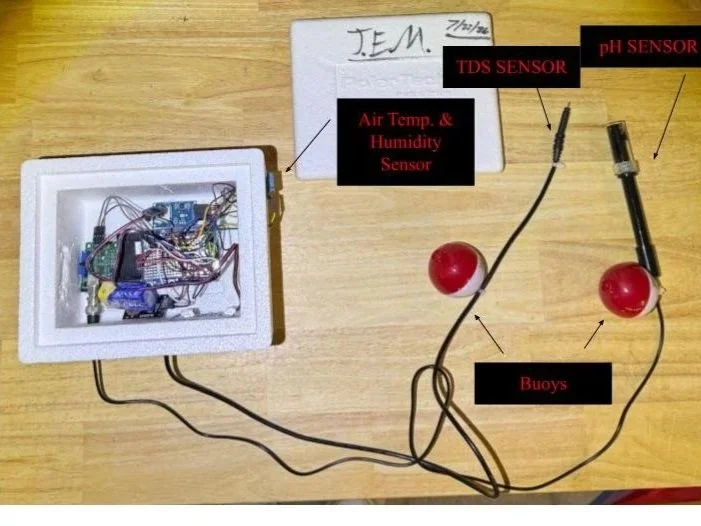
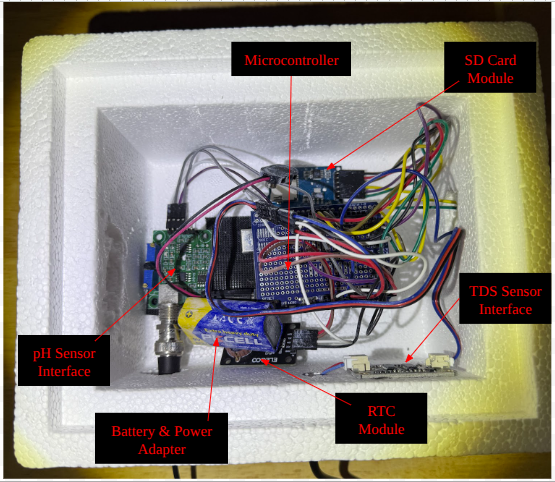
Ensure that the microcontroller and all of the micro-boards for each respective sensor are isolated and shielded from outside elements (e.g. this experiment utilized a small, enclosed styrofoam container).
Ensure that all sensors are secured tightly to the housing (excluding the ends of the TDS and pH sensors) to prevent any damage that could be caused by transportation.
Ensure easy access to the pH sensor for the attachment and detachment of the pH probe itself—the best way to achieve this is to use velcro-tape that can allow the sensor to both be removed and tightly fastened when needed.
Ensure easy access to the SD card module.
Ensure easy access to the power-supply port located on the microcontroller so that the battery can be changed out with ease.
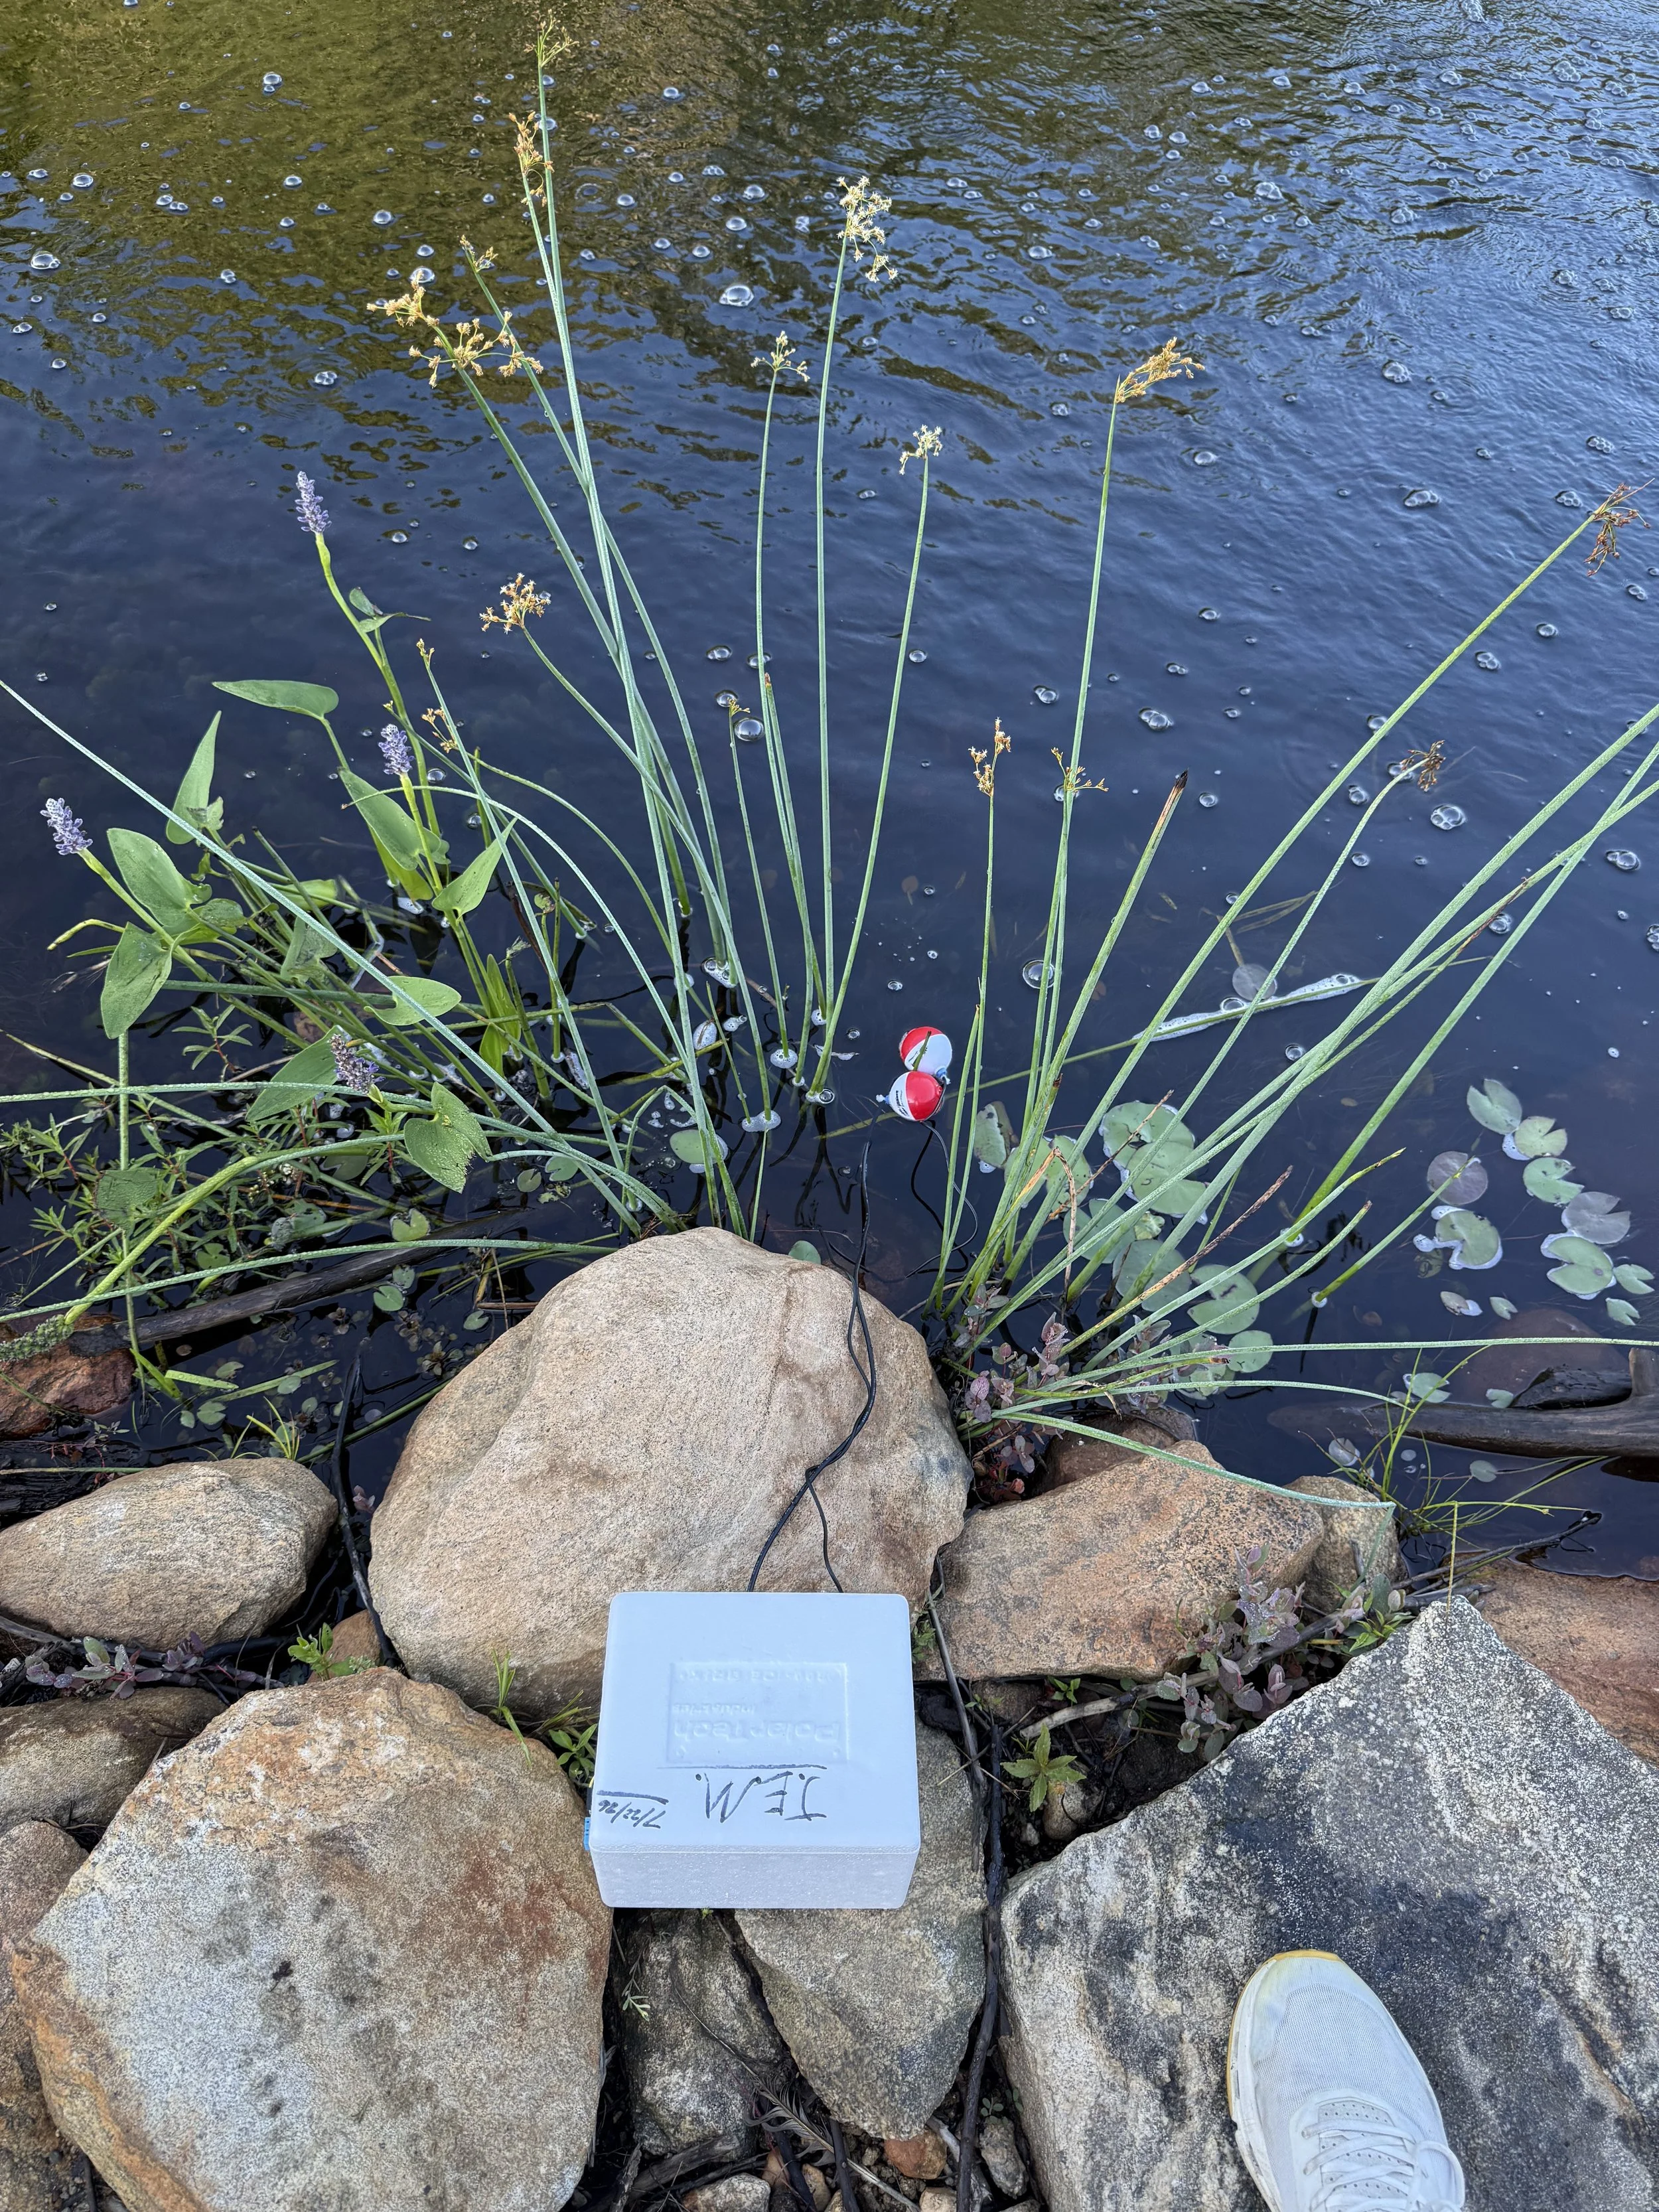
Connect some sort of buoyant device (this experiment used fishing bobbers) near the ends of each sensor in order to prevent the sensors from potentially hitting the bottom of the lake, and thus hitting loose sediment.
IMPORTANT TIPS
❋ Prioritize Isolation: All of the micro-boards, and especially the microcontroller, are extremely sensitive to water, so make sure that they are isolated and kept dry.
❋ Place the SD Card Module Strategically: The SD card will have to be removed and reinserted several times throughout the experiment, so easy access would be wise.
❋ Glue is a Go-To:One of the easiest ways to attach and secure items permanently within the styrofoam container is to simply use hot and/or super glue.
❋ Styrofoam Housing is Versatile:Undoubtably, the best encapsulator to use for this project is a styrofoam container: they are easy to manipulate, edit and tweak, and they are great insulators.
Creating the Housing for the Sensors
(Creation of the sensors’ housing)
A View of the Apparatus & Sensors